Freedom Camping in Taranaki

3 Nights Freedom Camping in Taranaki – Waverley Beach

If you’re looking for freedom camping in Taranaki, north of Wanganui on the West Coast of New Zealand, then you can’t overlook Waverley Beach. About an hour from Wanganui is the small town of Waverley and on the coast is Waverley beach. If you’re looking for the ideal location for freedom camping then this is it!

After grabbing a coffee at the Main Street Cafe or the Four Square if the cafe is closed, turn left and head out to Waverley beach.

There are a number of options for staying at Waverley Beach. There is a paid campground and there are some beautiful locations with ocean views for freedom camping in Taranaki.

Waverley Beach Campground

Waverley campground is a popular location for those who wish to stay in a paid location. The facility has 28 unmarked powered sites. There’s a hot shower, toilet, basic kitchen facilities, a playground and free use of a BBQ for campers.

As of 2024 the fees for Waverley Campground are:

Powered Site – $21.00 per powered point/powered site/per night

Non-Powered Site – $17.00 per site/per night

Freedom Camping in Taranaki at Waverley Beach

If you don’t need to use the paid campground and intend freedom camping, then you can choose from some amazing cliff top locations with beautiful ocean views.

Cell phone coverage on Spark is adequate. Enough signal to make phone calls, text message, and use the internet. Internet is adequate for streaming video content.

Signs indicate that three vehicles per night are allowed and you can stay for three nights in a calendar month. There are signs indicating where dogs are allowed, with dogs permitted on Long Beach but not on Cave Beach.

A short walk from the freedom camp parking there is a toilet block. It’s serviced daily, flushing toilets and cold showers are available.

Waverley Beach is a beautiful black sand beach. A short walk – 50 to 200 metres from your freedom camping site at the end of the gravel road is beach access. There are amazing cliff and rock formations as well as deep caves where the crashing waves are slowly eroding the cliffs. It can be windy freedom camping at the cliff top location, but it’s certainly worth staying here on a beautiful sunny day. You’ll be treated to amazing West Coast sunsets.

There is a dump station in Waverley – Chester Street as you drive into Waverley from Wanganui.

Dump Station in Waverley

For more information about freedom camping at Waverley Beach or freedom camping in the Taranaki region check out the South Taranaki District Council website.

Read our blog about Tongaporotu – the 3 Sisters and elephant rock, if you’re looking for more locations for freedom camping in Taranaki.

EPEVER solar charge controller

Why Do You Need a Solar Charge Controller?

EPEVER solar charge controller

A Solar Charge Controller is a regulator for your batteries used to prevent overcharging and discharging. Solar panels are connected to the solar charge controller, as are the batteries. The Charge controller sits in the middle – it’s the link between batteries and solar panels.

You need a solar charge controller to ensure your batteries aren’t overcharged. The voltage on your solar panels can range from 16 to 32 volts or more. For example, a “12 volt solar panel” will actually produce around 18 volts, and without a load, closer to 21 volts. A “24 volt panel” will be producing around 32 volts, and without a load, close to 45 volts.

Your solar charge controller takes care of the higher voltage and ensures that your batteries are receiving the correct voltage. A 12 volt battery is fully charged at 12.6 volts. But to actually charge that battery, the input voltage needs to be over 14 volts usually, and the exact number will depend on the type of battery you have. Some people have their electrics set up as a 24 volt system. If they only had a “12 volt solar panel” – where the maximum voltage would be around 17 volts, it’s not going to have enough voltage to get the batteries charging.

A solar charge controller also prevents power from leaking back, from the battery to the solar panels at night time. Depending on the type of solar charge controller you have, it may have many other useful features, such as allowing you to stop the battery from being over discharged.

With batteries such as AGM or GEL, the amount of power they need from the solar panels changes. If they’re low on charge, they’ll absorb a lot more power. As they get closer to fully charged, they need to soak up less power – slow down the rate of charge, and this again is where the solar charge controller comes in.

PWM vs MPPT Solar Charge Controller

There are two different types of solar charge controller you can install. PWM stands for Pulse Width Modulation and MPPT is short for Maximum Power Point Tracking.

PWM controllers are an older technology and not as efficient as the newer technology MPPT solar charge controller. A PWM solar charge controller, being an older technology are generally cheaper than an MPPT solar charge controller.

A PWM solar charge controller probably still has it’s place in the scheme of things. If you’re only using it in a really small power system, perhaps an 80 watt solar panel to keep keep a battery for some shed lights used occasionally charged up.

However, MPPT controllers are so cheap these days that for most situations I’d recommend using an MPPT controller. At the time of writing, a 30 amp EPEVER Tracer MPPT Solar charge controller comes in at around $209 from Sunny Tech Solar. That would allow you to have up to a 390W solar panel at 12 volts, or 780 watts of solar at 24 volts.  

My Solar Charge Controllers

I’ve got four solar charge controllers. An EPEVER 30 amp charge controller in the van. The motorhome, because there are three different electrical systems has 3 charge controllers. A 30 amp Fangpusun PWM charge controller, a 10 amp EPEVER MPPT controller and a 40 amp EPEVER MPPT controller.

I like the Fangpusun PWM charge controller, it’s easy to use and has served me well. I bought it back when MPPT technology was a little out of my budget.

See more about my electrical set up here.

The EPEVER Solar Charge Controller

I’ve used EPEVER solar charge controllers for a number of years now without any problems. They’re easy to use, the terminals are easy to connect your wires to, and there are a couple of good accessories – the MT50 and EPEVER Solar Station Monitor.

The MT50 is connected to your charge controller and allows you more control of functions, settings and display. It gives more functionality than what you can access from the basic charge controller unit. They’re available at most RV or Motorhome stores such as RV Supercentre. People that have them say they’re worth having, but I don’t have one. I may get one, or two, in the future, but at the moment I’m using the EPEVER Solar Station Monitor.

The EPEVER Solar Station Monitor

Downloading and Installing the EPEVER Solar Station Monitor

The EPEVER Solar Station Monitor is software that you can download from EPEVER and install on your computer. I’ve got it running on an old Windows 7 laptop as well as a newer laptop. It works successfully on both.

All the files you need should come zipped in your download. Unzip the folder and install. It pays to read the instructions! The RS485 cable plugs into the communications port on the charge controller and into the USB port of your computer. I spent a little while searching on the internet for drivers for the RS485 cable, when they were actually included in the download.

You’ll need to purchase the RS485 cable. I bought my cable from Sunny Tech Solar.

The EPEVER Solar Station Monitor Interface

It’s nothing flash, seems like it was coded in the 1990’s (it probably was), probably in C# with Windows Forms, but does what it says on the tin.

You’ll need to set up your ‘solar station’ with the add station button top left. At first it can seem a bit confusing or complicated, but most people will be able to figure it out or at least know someone who can help.

I decided to use the Solar Station Monitor because I had bought ‘drop in’ Lithium batteries, that weren’t really ‘drop in’ batteries. They needed the charge settings to be changed otherwise I was getting high voltage spikes.

The Solar Station Monitor has given me the ability to input the exact settings I want. By clicking on Parameters (P) I can access the following panel which gives you the option to select your desired settings.

You can monitor in real time your load – the blue line, the input from your solar panels – the red line, and the charge going into your batteries, the green line.

The following screenshots relate to the Lithium batteries in my motorhome. Two 100 amp hour Lithium Valley batteries in series giving 100 amp hours at 24V. The Solar panels are two 370 watt panels.

The image below shows the load (blue line). That includes the Samsung 255L fridge, but in it’s off cycle, the Laptop being used plugged in and charging – just over 2 amps of draw (fridge and laptop), mobile phone plugged in charging – jumps up to just over 3 amps, the Samsung 255L fridge kicks into it’s cooling cycle, the large brief jump is the water pump being used momentarily.

The image below – Load is only the Samsung 255L fridge. The fridge cycles on and off as needed, and this is when it is in an off cycle.

Image below – fridge is cooling

Image below – fridge cycles – off, on, off, on. The one blue spike is the water pump.

Image below – fridge cycle on – every so often, perhaps twice a day it seems to do a cycle where it draws a lot higher amps.

Overall I find the EPEVER solar charge controllers to be great. And the Solar Station software gives me the option to see what’s going on if I need or want to, as well as tweak the settings for the charging inputs etc.

In the near future I plan to take some screenshots of the usage in my small van. Using the same batteries set up in parallel as 200 amp hours at 12 volts, running a 40 litre Waeco fridge, 1100 watt Nomad Pure Sign Wave Inverter with laptop, phones, and lights, a much smaller system, but also only one 270 watt solar panel.

In the meantime, be sure to check out Lake Aniwhenua – one of my favourite freedom camping spots!

Chinese Diesel Heater

Installing a Chinese Diesel Heater

Chinese Diesel Heater
Diesel Heaters, aka Space Heaters or Parking Heaters

Installing a Chinese diesel heater in your motorhome, van, or RV is a great way to keep warm in the winter. They’re efficient, provide a warm, dry heat, and are relatively easy to install yourself. I’ve got two diesel heaters installed. In this article I’ve put together my thoughts on the Chinese diesel heater.

Based off the Eberspächer and similar heaters originally, the Chinese ‘copy’ of this parking heater has become extremely popular. They cost a fraction of the price. People who own them can often be heard stating that they could buy a Chinese diesel heater and six spares for the cost of one Eberspächer heater. I’m not sure anyone has ever needed to though as the Chinese copy seems to be reliable if installed and operated correctly.

Cost of Chinese Diesel Heaters

The cost of these heaters has dropped dramatically over the last few years, and spare parts for them have increased in availability. My first Chinese diesel heater cost $650 second hand 5 years ago, and I’ve recently bought another one for $250 from Trade Me. They can be purchased direct from overseas for a similar, if not cheaper price.

My Diesel Heaters I’ve Installed

I’ve found the Chinese diesel heaters to be generally reliable and good. I have one in my van, one in my motorhome, and I’ve just purchased a second one so as to have two in the motorhome. I’ve done this as a back up, they’re cheap enough and while reliability seems good, you just don’t want it to break down on a cold night and have no heating. So I figured since they’re so cheap I’d throw a second one in.

The heaters I have are 5KW. The van, being small heats up in ten minutes. The motorhome at 9 metres is the perfect size for the 5KW heater, and often I only run it on it’s lowest setting. It’ll warm the entire motorhome up easily. Although I’ve never timed it, my estimate is that from 8 degrees inside the motorhome, it will be up to 20 degrees in 15 minutes. On a cold day outside it’ll keep you plenty warm enough.

Chinese Diesel Heater

How Many Amps Do Chinese Diesel Heaters Draw?

Chinese diesel heaters need power as well as diesel to run. They use the most power on start up while the glow plug does its thing. It’ll draw about 8 to 10 amps while it starts up – around 5 minutes or so. Once running, depending on your heating needs it’ll use roughly one amp an hour. Your existing power supply should be adequate to run the diesel heater. Running my diesel heater has very little impact on my power supply. It’s running off a couple of AGM batteries and 300W of solar. See more about my electrical set up here.

How Much Diesel Does a Chinese Diesel Heater Use?

Diesel use is minimal. The actual amount you use will depend on the heat setting. On a low setting you’re probably looking at around 0.2 of a litre per hour, and if you turn it up to a high setting you’ll be using closer to half a litre of diesel per hour. Realistically, diesel usage is not an issue – I find that I run my heater on it’s lowest or second lowest setting. So allowing 0.2 liters of diesel per hour I’m getting 5 hours of heating for a litre of diesel. Although diesel prices have gone up somewhat, it’s still pretty reasonable considering I wouldn’t have the heater going all day. Even on the lowest setting in the day time, it’ll get too warm inside with it constantly on.

Install a Carbon Monoxide Alarm

Diesel heaters exhaust fumes contain carbon monoxide which can kill quickly and silently. Although the exhaust exits outside the vehicle, I’d never install or use a diesel heater in a location without a good carbon monoxide alarm. I’ve got two in my motorhome. It’s just not worth the risk.

Can You Install a Chinese Diesel Heater Yourself?

The short answer is yes. The longer answer is that it depends how handy you are at wielding a few tools. You’ll need to cut a hole in the floor of your vehicle, and wire up the electrics to the battery.

Depending on your vehicles floor you may need to cut or drill through wood or metal. My motorhome has a wooden floor and the van has a typical metal van floor.

You’ll need to carefully plan and consider where you’ll install the heater. It needs to sit upright. On the bottom of the heater is an air intake which the heater uses to bring in air from outside for the combustion process. Next to this is the exhaust outlet, and this again must be vented to the outside of your vehicle. The exhaust gets very hot! As does the outer casing of the heater. This really means you need to use common sense when installing. You’re dealing with something that if installed incorrectly, is dangerous. With that said, I’d say give it a go yourself. Plenty of people have installed them, there’s even Facebook groups dedicated to Chinese diesel heaters.

Diesel Heater Components

What’s in the box? All this apart from the kitten

The diesel heater arrives neatly packed in a box with all the components you need. At first you’ll probably wonder if you’ll ever work out how to put it all together. For my first install, I had a pretty good idea of how it went together, but I decided to ask someone to confirm a couple of questions I had.

It’s a little bit like a jigsaw. Most components will only go in one place. For example in the picture below I’ve attached the air intake pipe (black) and put the round filter on the end. And the silver pipe is the exhaust with the muffler still in the bag. The silver pipe and black pipe are slightly different sizes. Therefore you can’t put them on the wrong part of the heater – they won’t fit – like a jigsaw. All this minus the clamps that are provided to tighten and hold it all firmly together.

Heater showing air intake pip and exhaust pipe connected

The photo below shows the fuel pump and filter with the fuel line provided. If you haven’t yet bought your diesel heater, I’d recommend getting one that has this coloured fuel line. It’s what I’ve always got, and I’ve read in a number of places that it’s better than using the green fuel line that some of the Chinese diesel heaters come with.

Chinese diesel heater fuel pump
Fuel line, fuel filter, and fuel pump

The photo below shows the fuel filter and the fuel pump. Fuel flows from the tank, to the fuel filter, and then to the fuel pump. The fuel filter ideally should be facing the other way as any sediment in the fuel can then catch on the outside of the little mesh basket inside the filter as opposed to filling up the small mesh basket. There’s no arrow on the fuel filter, whereas the fuel pump has an arrow on it that shows the direction of fuel flow / install.

Fuel filter (installed around the wrong way!) and fuel pump

You can install your heater using the 10 litre plastic fuel tank supplied, or you can T off into the vehicles fuel supply if your vehicle is diesel powered. The photo below shows the supplied pipe to connect to a vehicles fuel tank. The connections along the fuel line are made using the supplied rubber hose which you cut to small sections, push the white pipe into, and clamp with the supplied fittings.

Install an Additional Power On/Off Switch

I recommend adding another power switch. When you connect the heater to your battery, with most of these heaters the LCD screen will stay on. I’d rather have control of what items are on in my van, RV, or motorhome, especially when it comes to a device that can give off carbon monoxide fumes and creates heat. Although generally very reliable and good heaters, I’ve walked into my motorhome and found the heater ON, albeit only the fan blowing cold air, but some fault has caused it to switch itself on. I’ve read of similar things on Chinese diesel heater Facebook groups.

Some people will suggest that you don’t add another power switch. Their reasoning is that someone may accidentally turn the heater off using this switch. Indeed, it’s important that the heater is not switched off by an external switch. The heater must be switched off using the off button on the controller provided. The heater then goes through it’s own cool down cycle. This must be allowed to happen. Once it’s done this, you can use your additional switch to completely cut power to the heater.

All things considered, I’d rather have control over when the heater has power supply to it. If you’re worried about someone ‘accidentally’ turning the heater off by your additional power switch, mount the switch in an out-of-the-way place.

Other Tips I’ve Learned Along My Diesel Heater Journey

Install the fuel tank outside rather than inside the vehicle. It makes it easier to fill up and it’s not going to make the vehicle smell of diesel if you inadvertently spill diesel while filling.

Make sure the fuel pump is installed on the correct angle. Check your instruction booklet that comes with it. Although perhaps a bit hard to follow, the pump needs to be installed on about a 45 degree angle.

There’s a correct way to install the muffler on the exhaust too. Have a close look and you’ll see a small hole on one edge. This is to let any moisture drain out of it. It needs to be installed so that moisture can drip out this hole.

You can draw in air from outside the vehicle, or recirculate the air inside the vehicle. I’d recommend recirculating the inside air. That way you’re not ‘heating up’ cold outside air. It also prevents drawing in outside air which may smell of diesel exhaust.

Point the exhaust away from your vehicle. You don’t want the exhaust smell hanging around or exhaust fumes with carbon monoxide building up under your vehicle.

Note the angle of the fuel pump

Please note that none of the above is intended as a “how to guide”.

I’d recommend the Chinese diesel heater. For $250 NZD you can’t go wrong. Have a go at installing it yourself. Use common sense, talk to people who have installed them, there’s plenty of information on YouTube and Google, and join the Facebook groups.

So go ahead, get yourself one of these heaters and get out there over the winter months! Here’s a recommendation of one of my favorite places to stay – The Three Sisters, Tongaporutu!

Buying an RV house battery

Buying an RV House Battery: How Many Do You Need?

Buying an RV house battery

When I was setting up my motorhome I had no idea how many batteries I would need. Other than knowing I needed a deep cycle battery, I didn’t know much else about buying an RV house battery. I started off on a budget, buying two at a good price from contacts in the automotive industry. Over time my power needs grew and I now have a total of five batteries set up as three different battery banks. See how I set up my electrical system here. If you’re looking at buying an RV house battery, the number you need will depend on many things.

Batteries are expensive and this may be a limiting factor for some people. Another thing to consider is how often you will be using them. Is it for the odd weekend away, a couple of weeks at a time, or do you live in your motorhome full time? You need to think about what your power needs are going to be, although the problem with this, as was the case for me, is that over time your power needs might grow.

Your batteries are storing the power that you want to use. That means that you need enough to get you through the times when you have no battery charging capability – overnight if your batteries are charged by solar. This might be longer if you have a period of bad whether when your solar charging capabilities are limited by cloud.

So if you’re buying an RV house battery, how many do you need? Assuming budget isn’t a factor, it’s a good idea to buy as much as you can (within reason) and solar panels to match. (enough solar to top up your batteries daily) It’s good to know you have enough battery power and solar panels to not have to worry about your power usage. Check out this article if you’re wondering how many solar panels you should have.

The RV house battery set up in my van

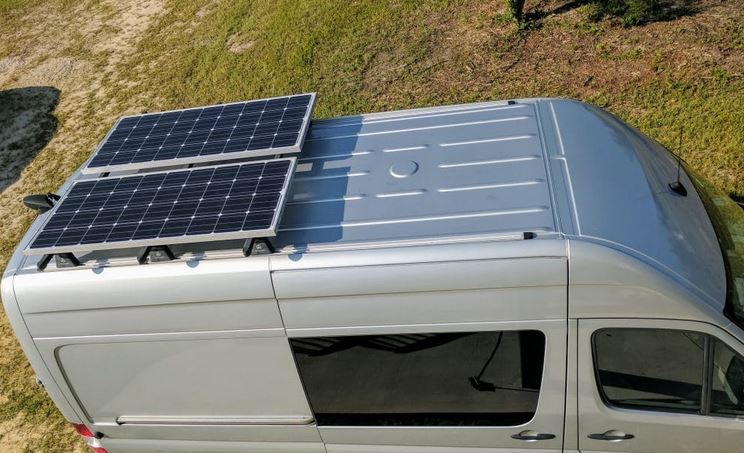
As a guide, in my small van I’ve been using 200 amp hours of Lithium (12 Volt) and a 270 watt solar panel. This is running lights, a small Waeco 40 litre fridge, a laptop computer most of the day and charging two phones. The most I’ve seen the batteries drop is to 70%, meaning I’ve used 30% of the 90% capacity when using lithium batteries.

The RV house battery set up in my motorhome

In my motorhome I have three different battery banks. 100 amp hours of lithium bought from Sunny Tech Solar at 24V is powering the 255L Samsung Fridge and water pump. 200 amp hours of AGM at 12V is powering lights, stereo, laptop, monitor, charging phones, and the diesel heater. 100 amp hours of AGM is being used for charging small items, lights, cigarette USB items, spark for the gas oven, spark for the gas hot water.

The minimum amount of RV house batteries I’d want to have

As a minimum I’d want 100amp hours of lithium in a small van, and in a motorhome or RV I’d want 400amp hours of lithium. If you’re installing AGM batteries or similar, you pretty much want to double the amp hours of the lithium. So 200amp hours of Lithium minimum in a small van and 800amp hours of AGM in a motorhome. Read more about how to choose house batteries for your motorhome or RV here.

Use a formula to calculate your power needs

There are more scientific methods you can use- formulas to work out your power consumption. The idea as that you buy your RV house battery to suit your exact power needs. Work out everything you want to be powering in your motorhome, use the formula to see how much power they are going to use, and then buy your RV house battery and solar panels to match this number. Thats fine, assuming you already know what you’re going to use, your power needs don’t increase over time, and you’ve factored in the weather conditions, where in the world you are (daylight hours are location dependent) and know how long you’re going to use each item daily.

Gather ideas from other motorhomes, RV’s or vans similar to yours

My suggestion is to talk to people with motorhomes, RV’s or vans, similar to what you own or are building, ask them what sort of RV house battery they have, find out how it’s been for them, how many they have, and what powered items they use in their vehicle. It’s really worth getting to know a bit about the house electrical system in your motorhome, that way if you’re camped in the middle of nowhere and something fails, you’ve at least got a chance of restoring power yourself. This all assumes you’re working with 12 volt or 24 volt power supply. Not mains power.

How to Charge RV House Batteries

Solar panels are a great way to charge your RV house battery. The sun is providing you with free energy every day. Even on cloudy days your solar panels will still work. The output will be reduced, but as long as there is light you’ll get a small amount of charging. If you think you’ll be worried about charging on cloudy days, add an extra solar panel. Instead of 1amp of charging from the panel, adding a second panel would double it to 2amps on a cloudy day.

Although not a preferred option by many due to the noise, you can use a generator to charge your batteries.

How to Charge Your RV House Battery While Driving

You can charge your RV house battery using the vehicles alternator while driving. A device called a voltage sensitive relay (VSR) is used to allow charging of the vehicles battery and the RV house battery at the same time. When the engine battery reaches 13.7volts the VSR allows charging of the RV house battery. When the engine is stopped, the voltage drops and the VSR disconnects the RV house battery from the vehicle start battery. This protects the RV house battery from voltage spikes when starting the vehicle and prevents the vehicle start battery being inadvertently drained.

Gel, AGM and Lithium batteries all have different requirements for charging. You need a charge controller that you can input the correct charging settings for your type of battery. This is pretty simple to do on most charge controllers. If you’re using lithium batteries, make sure your charge controller supports their special charging requirements. See more about my charge controllers here. I look at the EPEVER charge controllers and the EPEVER Solar Station Monitoring software.

RV house batteries

How to Choose RV House Batteries for Your Motorhome or Van

RV house batteries

My RV House Batteries

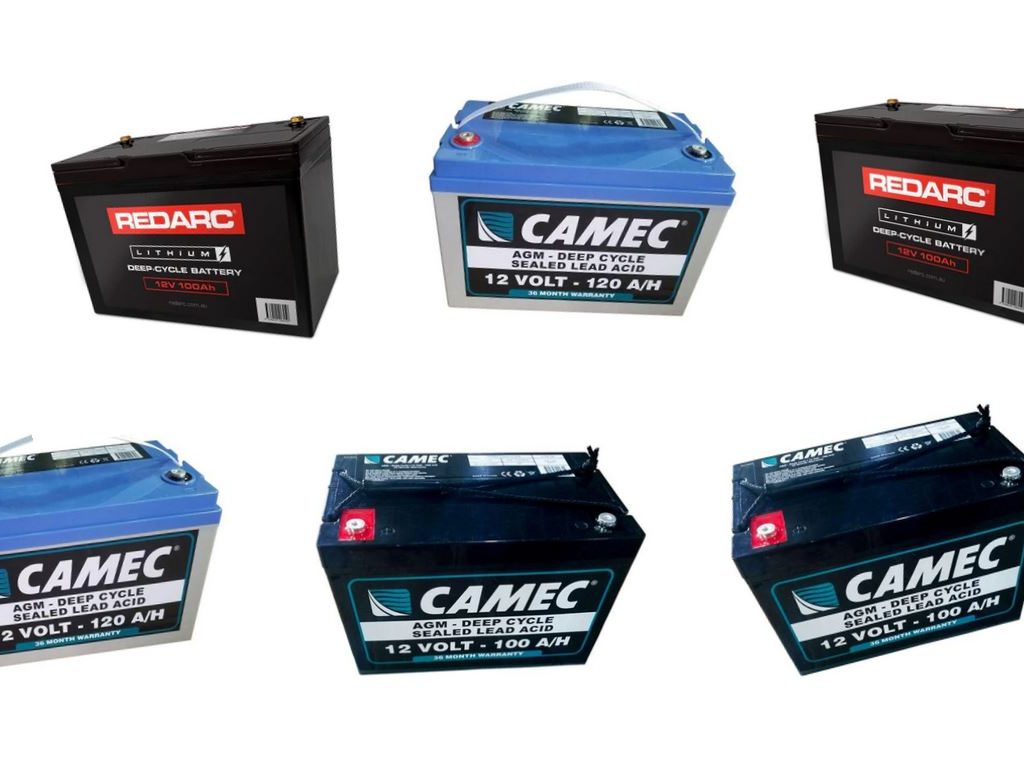
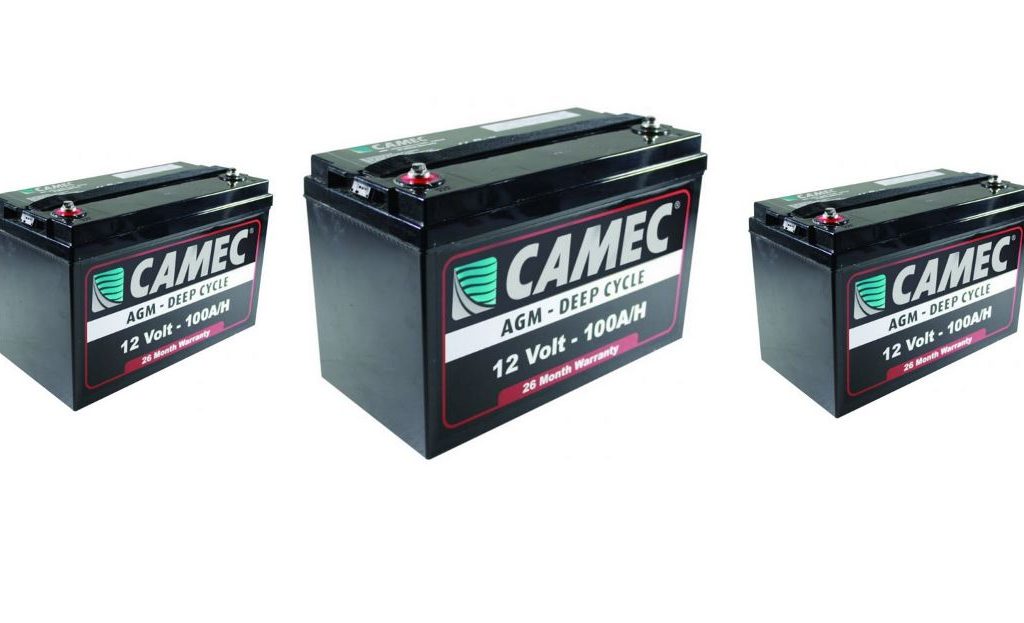
I began my journey into RV house batteries knowing very little about them. Like most people, I knew they were something I needed in my motorhome although other than needing deep cycle batteries, I didn’t know anything about amp hours, the different types, how to use them, or what I really needed. I was on a tight budget so I also needed to get something that was relatively cheap. I started off getting two 90Amp hour deep cycle batteries, discounted at a good price from people I knew in the automotive industry. I connected these in parallel which gave me 180 amp hours at 12 volts.

As my power needs grew I bought a second battery. A 100 Amp hour 12 volt AGM battery which I also bought a small charge controller and solar panel for. I needed to get another charge controller and solar panel as you shouldn’t connect different types of batteries, or batteries at different stages of their life.

Finally, I wanted to run a household fridge on an inverter full time. I invested in Lithium batteries. I bought two Lithium Valley batteries. 100 Amp hours each at 12 volt and I have them connected in series giving 100 Amp hours at 24 volts. I plan on doing a full review of these batteries which I bought from Sunny Tech Solar soon! Read more about my electrical set up here.

Why Do You Need RV House Batteries?

Your vehicle has batteries, so why do you need to go out and buy extra batteries? The short answer is – you don’t.

But, there are so many reasons why you would want to get RV house batteries. To start with, the battery in your vehicle isn’t designed to power the appliances you would use camping, out in your RV, motorhome or van life. The battery in your vehicle is designed to supply a high current for a brief time to turn over the starter motor in your vehicle, and it’s then charged by the vehicles alternator.

RV house batteries are deep cycle batteries. They’re built to handle a deep discharge, meaning that you can use a lot more of the battery capacity, over a long period of time, charge it up again, and repeatedly do this without damage to your battery.

You might think of it as your car battery being a sprint runner, and your deep cycle battery being a marathon runner. The car battery delivers a high current for a brief period of time, whereas a deep cycle battery delivers a lower current but for an extended period of time.

So to summarize this question, you need RV house batteries because the battery in your vehicle is not designed to power the house lights, TV, or charge devices in your van or motorhome. You can do it, but you’ll be replacing your vehicle’s battery much sooner than expected.

Benefits of Having Separate RV House Batteries

Not only will it save you needing to replace your vehicle’s battery early, there are many other benefits to having RV house batteries.

You’re using the right type of battery for the purpose so it’s going to last and you’ll get your monies worth from it. A good deep cycle battery should last you at least six years depending on how you use it and care for it.

With dedicated RV house batteries you can monitor your power usage, charge them with free energy from the sun, and power the appliances you’d want in your motorhome.

Keeping your house battery and vehicle battery separate means that there’s no chance of waking up to a flat battery in your motorhome and not being able to start it.

The Different Types of RV House Batteries

Within the deep cycle battery category there are different options available.

Flooded Lead Acid batteries

Flooded Lead Acid batteries are the oldest of the options. They have lead plates that are submerged in an electrolyte mix of sulfuric acid and water. Because of this they need to be installed upright in a position where they cannot fall over and spill dangerous chemicals. They need to be outside your vehicle or in a ventilated space as they give off dangerous gas when they are charging.

Absorbent Glass Mat (AGM)

The Absorbent Glass Mat (AGM) battery is a type of Valve Regulated Lead Acid (VRLA) battery. They’re constructed from thin fiberglass mats placed between the lead plates. The fiberglass mats absorb the electrolyte and act as a damper between the plates. These batteries won’t spill any liquid, they’re sealed, and can usually be installed in any position.

Gel batteries

A gel cell battery is another of the VRLA batteries similar to the AGM battery. The electrolyte, sulphuric acid and silica is mixed together and becomes a gel like substance. Like AGM batteries, gel batteries can be installed in any position, they won’t spill and are maintenance free. They don’t give off dangerous gas like flooded batteries so can be installed inside. Both AGM and Gel batteries have better resistance to vibrations – the gel make up of the battery tends to absorb extreme vibrations in contrast to a wet cell battery.

Lead Carbon batteries

Lead Carbon batteries are a new type of VRLA lead acid battery. They use a common lead positive plate (anode) and a carbon composite negative plate (cathode). Lead Carbon batteries are supposedly a step up from AGM and Gel batteries and often seen as a rival to LiFePo4 (Lithium) batteries.

LiFePo4 (Lithium) batteries

Lithium batteries offer many advantages over AGM and Gel batteries. Although the initial cost is much more than AGM and Gel batteries, the cost is offset by the longer lifespan of Lithium batteries. Lithium batteries are safe to install inside and in any position. They are much lighter in weight than traditional batteries which is good for small van conversions or any situation where you need to give consideration to the vehicle weight. Most lithium batteries can be discharged 90 percent. Lithium are much faster to charge than other deep cycle batteries. Whereas traditional batteries may take most of the day to recharge, your lithium batteries can be recharged by mid morning on a sunny day.

Best Type of RV House Battery

The best type of battery to use as your house battery is most likely dependent on your budget and how you intend to use your motorhome. AGM and Gel batteries are great for those on a lower budget. In my opinion, the ultimate battery if you can afford it is to install Lithium batteries. Lithium batteries tend to be more expensive, but again, they’re worth it. If you’re wondering how many you’d need, read more about that here. They offer so many benefits and are really worth the investment especially if you live full time in your vehicle. Lithium batteries charge fast and soak up any energy the sun throws at them from your solar panels. Wondering how many solar panels you then need? Check out our article about solar panels here.

How I Set Up My RV Power Supply System

All the information on the internet about how to set up an RV power supply for your motorhome or van can leave you feeling overwhelmed.

There are many different ways your electrical system can be set up and so many different components, brands, and recommendations. I found it helpful to look at what other people were using in their campers and I was then able to get an idea of what I might need. The perfect RV power supply set up for your camper will come down to the needs of each individual. What do you intend to power? How often will you be away in your camper, or are you living in it full time? How much money do you want to spend on it all?

A Small RV Power Supply Set Up

I had decided I wouldn’t need much in the way of solar panels and batteries and would have very little power usage. My RV power supply would be for a little portable chiller, a few lights and charge my phone and laptop. I purchased two 12 volt 100 amp hour batteries and a 150 watt solar panel with a PWM charge controller. Very basic.

RV Power Supply Needs Grow…

Over time my RV power supply needs grew. I added another battery and solar panel. It’s not recommended to mix new batteries with old batteries or different types of batteries. So I now had two solar systems set up. This wasn’t the ideal way to set up an RV power supply but it worked for now.

And then I went even bigger. I had moved in and was living in my motorhome full time. I now have every thing I could want in the motorhome and as such my power needs had grown.

Solar panels for RV power supply

The motorhome now has three different electrical systems with solar panels and batteries for each. Check out more about how to choose batteries for your electrical set up here.


System One

2 x 12volt 100Amp/hr batteries for a total of 200 Amp/hrs.

2 x 150W solar panels

1 x 30A PWM charge controller

I use this for the lights, diesel heater, and an 1100W pure sign wave inverter. This powers any 240V mains appliances such as laptop and monitor.


System Two

1 x 100amp/hr AGM battery

1 x 90 watt solar panel

1 x 10A EPever solar charge controller

This is powering the car stereo and 12V cigarette lighter sockets for USB charging of devices, and items like the gas hot water heater and gas oven get their spark from it.


System Three

2 x 100 amp/hr Lithium batteries. 100Amp hours @ 24V

2 x 370W solar panels

1 x 40A EPever solar charge controller

These power the water pump and Samsung Digital Inverter fridge


This isn’t the most cost effective way to put an RV power supply system together for your motorhome. I wouldn’t recommend it, but sometimes this is simply what happens. Over time you realize you really want to run more electrical items on your travels. If you’re wondering how many solar panels you really need, check out this article here. Most of my electrical components were bought from Sunny Tech Solar.

EPEVER Solar Station Monitor

I use the EPEVER Solar Station Monitor software on my laptop. It’s a great way to adjust charging settings and to monitor your solar input and loads. It’ll run on old laptops, or at least it runs OK on my old Windows 7 laptop.

You’ll need to buy a special cable that connects from the EPEVER charge controller to your USB port on your laptop. It’s called an EPEVER PC Communication Cable CC-USB-RS485-150U.

The image below is a snapshot of my system at this time… Blue line = power I’m using, Red line is the power from the sun, Green line is what’s going into the battery. This is 200amp hour lithium battery at 24Volts and 780W of solar. It’s a 24V system.

It shows a time period between about 2.15pm and 2.45pm in this picture. The load (blue line) starts out at just over 2amps. That’s my laptop I’m using which is also charging. The load (blue line) increases to just under 4 amps which is where I plugged my mobile phone in to charge. The next increase which takes the load to almost 5 amps is where the Samsung 255L fridge cycles on. The big spike up to 8 amps briefly is the water pump – tap being used.

The red line is what I’m getting from the solar panels. The batteries are pretty much full, and on a float charge so the green line – what’s going into the batteries is maintained by the charge controller at pretty much zero.

One downside of the EPEVER system is that you don’t really know what your solar panels are putting out in the way of amps UNLESS your batteries are way down and soaking up the sun power. In contrast, I have an old PWM controller on which the display shows exactly what you’re getting from the sun – perhaps 12amps, and the next screen shows 2 amps actually going into the batteries. (or similar figures)

See more about my charge controllers and the EPEVER Solar Station Monitor here.

Pros and Cons of Three RV Power Supply Systems

I like having each separate system though. It gives redundancy, meaning if something breaks in one of them I still have power. Eventually I’ll reduce it from three systems down to two. I definitely recommend using Lithium batteries. The motorhome is well equipped for electrical needs. I don’t ever find myself running low on battery power or having to conserve power usage. I’m able to do all the normal things, I charge two cell phones daily and run a laptop and monitor all day every day. I’ll put the stereo on and use all the lights at night. It’s like living in a little apartment on wheels and the power is provided by the energy from the sun. With the combination of batteries and solar panels on the roof of the motorhome, I never have to worry about how much power I’m using. Even in the winter after a few cloudy days, I still have enough in the batteries. The solar panels will generate enough power even on cloudy days to keep the batteries from getting too low.

RV Power Supply Set Up for My Van

My van is a much simpler set up.

I have one 270watt solar panel, 200amp hours of Lithium battery at 12V, a 40 Amp EPever solar charge controller, and an 1100watt pure sign wave inverter. I run a little Waeco 40 litre fridge, and charge the laptop and mobile phone all using the inverter. Lights are 12V LED strip lights. I have a diesel heater for the winter, and these draw high amps on start up for a short time.

The top van life safety tips

Van Life Safety Tips

The top van life safety tips

How safe is it to live in a van in New Zealand? This is a common question that people considering van life or a road trip around New Zealand often wonder. The short answer is that living in a van in New Zealand is safe. Take a few safety precautions and the following van life safety tips and you’ll enjoy your travels.

In many ways it could be safer than living in a house (not that there’s anything unsafe about living in a house either). The added advantage of a van – you can start it up and go at the first hint of trouble. But in saying that, I’ve never experienced a situation where I didn’t feel safe, and most people who live in a van and travel New Zealand would similarly tell you it’s safe. Here’s our list of top van life safety tips.

Tell Someone Where You’re Going

At the top of our van life safety tips is to always tell someone where you’re going and where you plan to stay for the night. This is especially important if you’re going to be out of cell phone reception. It’s a simple step to take but one worth taking.

Park Your Van Near Other Campers

Following on from the first of our van life safety tips is to park where there are other campers. If you’re staying in a campground there will usually be other vans, motorhomes or caravans for added security.

If you’re not confident staying on your own in a remote location, plan to spend the night at a more popular camping location. You’ll usually find at least another one or two campers at these places even in the middle of winter.

Some travelers have a buddy system where they travel with other vans or motorhomers. You don’t necessarily have to travel together, but you could plan to meet up at a set camping location every night or second night if you’re heading in a similar direction.

Have a couple of potential locations to stay the night in mind. If you arrive at the first place and it doesn’t look good, it’s isolated, no phone reception, and there’s no other campers, you have time to move onto your back up location. This leads into the next of our van life safety tips.

Arrive Early and Check the Place Out

As well as having a back up location in mind, arrive early and give yourself time to check the place out properly in daylight. Arriving by mid afternoon is always a good plan. You can see what the location is like, see who else is around, and spot any signs of trouble before it gets dark. And if you don’t like what you see, you’ve got time to move on.

Add Security Lighting

When you’re fitting our your van you might like to install security lighting to the exterior. Lights can be mounted on the van roof or roof racks if your van has them. Locate the switch by your bed, and at night if you hear suspicious activity outside your van you can flick the switch and light up the night outside your van. This can be enough to startle any would be intruder or suspicious person and gives you the ability to see what’s going on outside. It’s also worth investing in a good solar panel and battery set up so that you’ve got plenty of power for lights. Check out Sunny Tech in Auckland for good quality products.

Install an Alarm or Siren

Another of our van life safety tips is to add an alarm or siren to your van. The combination of an alarm or siren with bright security lighting can act as a real deterrent. Again, you’d install the switch in an easily locatible position to your bed at night, ideally alongside the switch for your security lighting.

Know Where Your Keys Are

Knowing where your keys are is one of those important yet often overlooked van life safety tips. It really is worthwhile being in the habit of always keeping your keys in the same place. When you park for the night, will you put your keys in your pocket, a hook by your bed, or some other place? If you need to leave in a hurry in the middle of the night you don’t want to be fumbling for keys that could be anywhere in the van. Having them in one set place solves this problem. Keep in mind that you don’t want to inadvertently lock yourself out of your van. It’s no good standing outside a locked van and staring at the keys on a hook inside.

Keep Your Doors Locked

If you’ve parked and are inside your van it’s worthwhile keeping your doors locked. This goes for any time of the day, not only at night time. But certainly at night, get into the habit of making sure your check all the doors have locked at night, and don’t assume the central locking has locked them all for you.

Don’t Park Yourself In

An important one of our van life safety tips is to ensure you can drive off easily. Don’t park yourself in. When you park your van, give yourself room in front and room behind to drive out forwards or reverse if necessary. Try to park in a manner that other vehicles couldn’t block you in if they wanted to.

Invest in Good Black Out Curtains

If you don’t know who your neighbors are, or you’ve arrived late in the evening ensure your curtains are closed earlier rather than later. Invest in good quality black out curtains that cover the windows properly. If you’re arriving at a location and you know it will be dark, consider stopping beforehand and closing the curtains so that you pull into your parking spot for the night with the van closed up prior.

Retain Access to the Drivers Cab

A van is the perfect vehicle to be able to climb through from the back, into the cab, and drive off. This is one advantage over the likes of a caravan or vehicle where you need to exit the accommodation to be able to drive. If you haven’t yet bought a camper, this is something you should seriously consider. If you’re in the process of building your van you might like to ensure you retain access to the drivers cab from the back.

Have Something for Self Defense

It’s worth having an item you can use for self defense. This could be as simple as a can of fly spray. Have a look around your van at what items you have that could be used to defend yourself if necessary. What’s in your kitchen drawer or your tool box. You likely have a mallet or hammer in your tool box.

One piece of advice I remember being told is to ensure you can properly use the item and consider how it could be used against you. If the attacker overpowered you and got your self defense item off of you, it can then be used against you.

Don’t Publish Your Location

With the popularity of social media it’s common place to post a picture of your vehicle at your latest location showing off your amazing view. Keep in mind that you never know who is able to see your posts on social media. You’re telling everyone your current location, which vehicle you are in, and if you’re traveling alone. If you need to post on social media consider posting photos after you leave so that your posts are at least a day or two behind your actual location.

Reading though our list of van life safety tips might make you think it’s a dangerous lifestyle. That couldn’t be further from the truth. It’s a safe way of living, traveling and seeing the country. But it’s always worthwhile being prepared. Taking these and similar precautions will make it easy to enjoy the lifestyle and you’ll sleep at night knowing you’re safe and prepared in your tiny home on wheels. Be sure to check out our van life tips for living the dream life on the road.

5 Van Life Tips for Full Time Living on the Road

Van life is trending and people from all walks of life are embracing the lifestyle. It’s a great way to get out and explore the country or take some much needed time out. While the lifestyle can appear glamorous, and it is, there are still considerations to take into account before you get started . Here’s our top van life tips to help you prepare for the adventure of a lifetime.

1. Keep Safety and Security a Number One Priority

Whether in your van or out for the day, our first of five van life tips is that safety is a top priority. The best advice here is to trust your gut. If it doesn’t feel right or look right, don’t stay there. An alarm for your vehicle is a worthwhile investment, as is a steering wheel lock if you’re heading out. Invest in black out curtains and stay in brightly lit areas rather than dark unlit parks overnight. When you’ve found the ideal place to stay for the night, park the van in a way so that you can’t be blocked in and can easily drive off. Keep your keys in the same place every night so that you can find them quickly if you need to. Check out our van life safety tips for more great ideas.

2. Where Will You Park Each Night?

At the end of a long day exploring or driving you’ll want to unwind and relax. There’s nothing worse than driving around trying to find somewhere to park for the night. Check the local regulations about overnight parking to avoid expensive camping fines. It pays to check the local council website for freedom camping regulations. Some districts provide areas that you are allowed to stay in for free for a few nights at a time. Checking van life social media groups and Apps is a great way to discover recommended locations to stay. Traveling with pets can also require extra planning for pet friendly parking.

Van life tips for traveling on the road and road tripping.

3. Where Will You Charge Devices and Access WIFI?

One of the most important van life tips is to ensure you’ve got access to charging devices. You’d be surprised how much we rely on power and internet and it’s no different when living in a van. You’ll need to charge laptops, mobile phones, and tablets. Unless you have a good battery system and charging capabilities you’ll need to consider where to charge these devices. You might find a local library or community center allows you to plug in devices. Some service stations have phone charging stations. Cafes and library’s are good choices to use WIFI, and if you’re a Spark customer you have access to 1GB of free internet each day at the pink phone boxes. Maybe consider adding an extra battery and solar panels on your van to help with power needs.

4. You Won’t Need to Take as Much as You Thought

Storage space is at a premium in a van so you’ll want to carefully choose what you take with you. It’s a good idea to spend a week living in the van before hitting the road full time to get a sense for what you use. If you didn’t use it in that week, you probably won’t need it on the road. Taking some shorter trips away before going full time is another great way to find out what you need to bring on the journey.

5. Plan for Winter

Although last on our list, one of the most important van life tips is planning for winter. Living in a van in winter can be cold, even with the best insulation. Plenty of warm blankets, clothing, and hot water bottles can help, or invest in a diesel heater. You can get heaters installed, or with a bit of DIY knowledge you can install your own within a day. They’re available on Trade Me for a few hundred dollars, and if installed correctly are safe and efficient. Keep wet weather gear on hand. Reflective clothing is a must for extra safety in emergencies when traveling on the road.

With a little preparation and planning, living on the road and traveling in your van can be the best experience of your life.